| Overview |
|---|
| 1F |
| 2F |
| 3F |
| 4F |
| 5F |
| ?F |
Central Hall[]
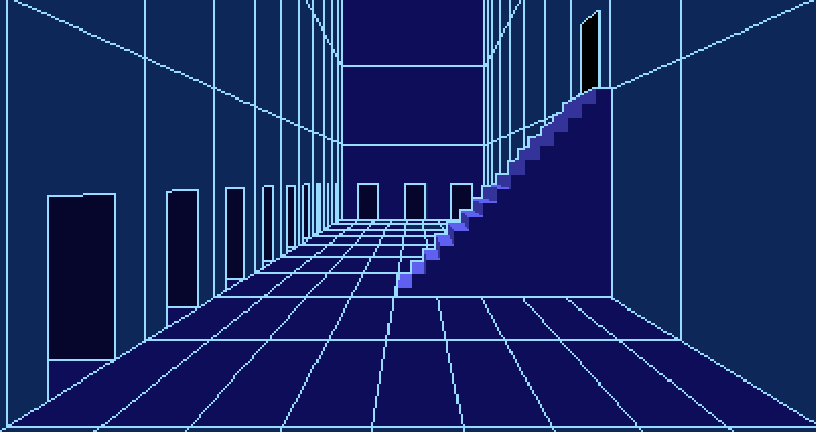
The Central Hall after the Second Floor stairs appeared.
The Central Hall (中央ホール, Chūō hōru?) is a large empty space where participants can meet up. It has at least nine doorways against one long wall and three more at one end of a shorter wall. After the Second Trial, a staircase appears against the other long wall which leads up to the second floor. Most of the doorways in the central hall lead to dead ends; however, there are cushions placed in them where apparently a number of the participants fell on after their various First Trials.
The Central Hall also leads to the passage to the bar, smoking area hallway, and the cafeteria.
Passage to Bar[]

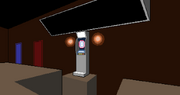
The passage is a long hallway with a doorway and vending machine present near the entrance, the rest of the hall empty with a dead end. The doorway, which leads into the Bar, has a sign that reads 'Bar' next to it on the wall. Right past to the doorway is a green vending machine that appears to sell water and soda for 1000 yen. Later in the game, you obtain a 1000 yen bill. That allows you to buy a drink, which instead drops the left arm needed to rebuild the doll.
Bar[]

The bar (バー, Bā?) itself, which is led onto by the passage to bar, is a well-lit room with red floors and walls. In the center is a brick setup. Many bottles of alcohol are on the shelves and the counter. To the left is a blackboard, which lists the names of people who both can and can't drink. Four stools are laid at the bar at first, but you can move one out of the way to open a secret compartment, which gives you one of the items needed to rebuild the doll.
Smoking Area Hallway[]


The Smoking Area Hallway (喫煙所のある通路, Kitsuensho no aru tsūro?) nearly mirrors the passage to the bar, with the exception of a small smoking booth at the back. Like the passage to the bar, it contains a single doorway with a green sign labeled 'game' next to it, signaling that it leads to the Game room. There is a brown vending machine in the hall, which dispenses cigarettes. There is already a cigar in the pocket of the machine when you check it for the first time.
Game Room[]

The Game Room (ゲームルーム, Gēmurūmu?) has a dart board which is surrounded by a large, squared pit. Above the dart board is what appears to be a vent with wind blowing from it. In the back, there is a blue door and a red door, leading into the Blue Room and Red Room respectively.
Blue Room[]


The Blue Room (青い部屋, Aoi heya?), past the blue door, is a purplish room that consists of a row of chairs on the ground and on a platform, and a painting of a man hung on the left side of the wall. The back wall is the only wall in that room with a brick design. There are five chairs at the bottom and four chairs at the top on the platform, which has a ladder connecting to the platform and floor. Four dolls sit in the chairs on the bottom and one doll sits at the top.
The painting is one of a man tipping his hat with a cigarette in his mouth. He wears a blue dress shirt and a red tie which is covered up with a black suit. He calls himself 'Meister' and is the master of the Blue Room.
Inside the room itself, 3 real bullets are found by Keiji, and a gun is found in one of the chairs. The items are used to play Russian Roulette in the same room.
Red Room[]

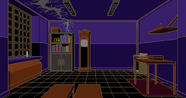
Past the red door (which is locked at the beginning of the game, only openable after Chapter 1, Part One) is a large puzzle room with a black tiled floor and blue walls. To the left is a large window, and a small candle stuck to the windowsill (immovable). On the back wall is a bookshelf with an alarm clock behind some of the books. There is also a box on top of the shelf and a grandfather clock next to it.
There is also a large teddy bear and vent on the back, although it is not displayed here. To the right is a shelf, and a table with another case. Once you solve the puzzle, a secret passage appears on the back wall, revealing a locker. This is where you meet Gonbee for the first time.
Cafeteria[]


The Cafeteria (食堂, Shokudō?) is a large room, and one of the three areas that connects onto the Central Hall. It contains at least twelve dining tables which can seat four people at once. Each dining table has nothing but a white tablecloth on it, and four pinkish chairs line the sides. There is a large glass window on one wall which allows sight into the kitchen, with a door beside it to enter. The whole room is illuminated by chandeliers. At the back, there is a large dark space with no lighting, which leads onto the appropriately named Back of Cafeteria.
Kitchen[]


The Kitchen (キッチン, Kitchin?) is a long, thin room with a large window on the left wall, giving view to outsiders from the cafeteria to look inside. The room's flooring and walls are neutral in color, and most of the cabinets follow suit, drawing attention to the grey fridges, ovens, and kitchen utensils, but even more so a bright blue object resembling a cabinet on the side.
Back of Cafeteria[]


The back of the cafeteria (食堂の裏, Shokudō no ura?) is a dark space with a door and a single red light above. The door leads to the Pink Room and to the right, there is a hidden door that leads to the Secret Room.
Secret Room[]

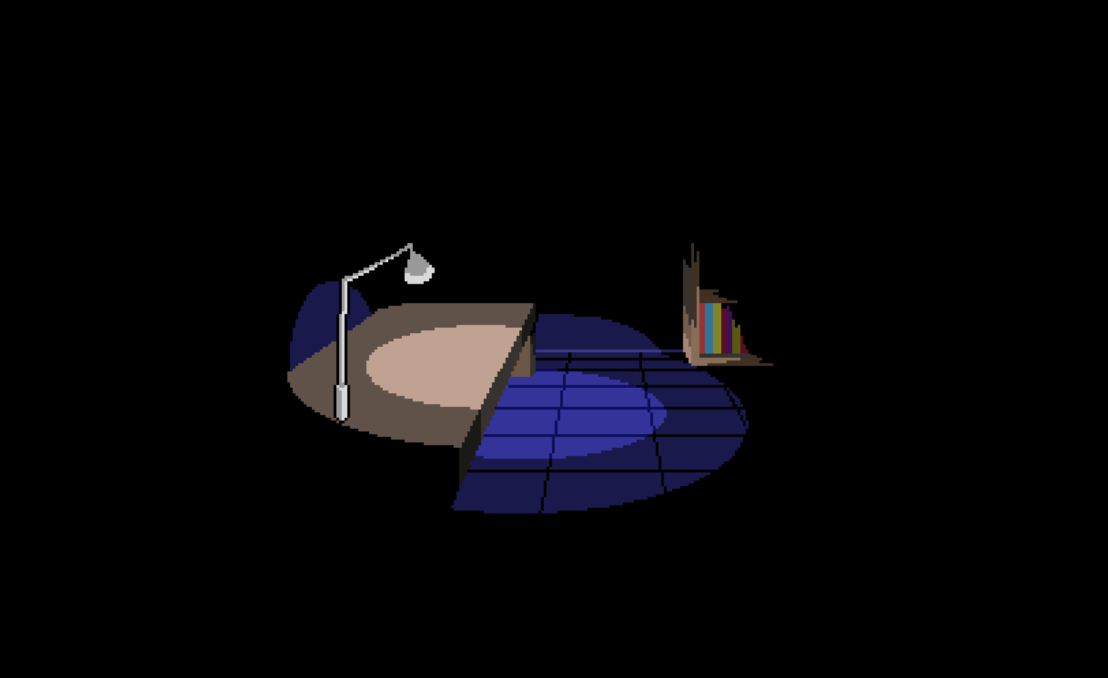
The small room itself is completely dark, except for a single lamp that illuminates part of the room. On the right, there is a book shelf which is mostly hidden away in the dark. On the left is a long desk that has the lamp connected to it. The lamp's light focuses on a laptop found on the desk.
Pink Room[]


The Pink Room (ピンクの部屋, Pinku no heya?) is the room where Sue Miley first appears. The room itself is pink with two empty white shelves on both sides of the room and stuffed animals scattered around the doll torso which lies against the back wall of the room. In the center of the wall, there is a large, pink, heart-shaped vent, which can be climbed through in order to enter Miley's room.
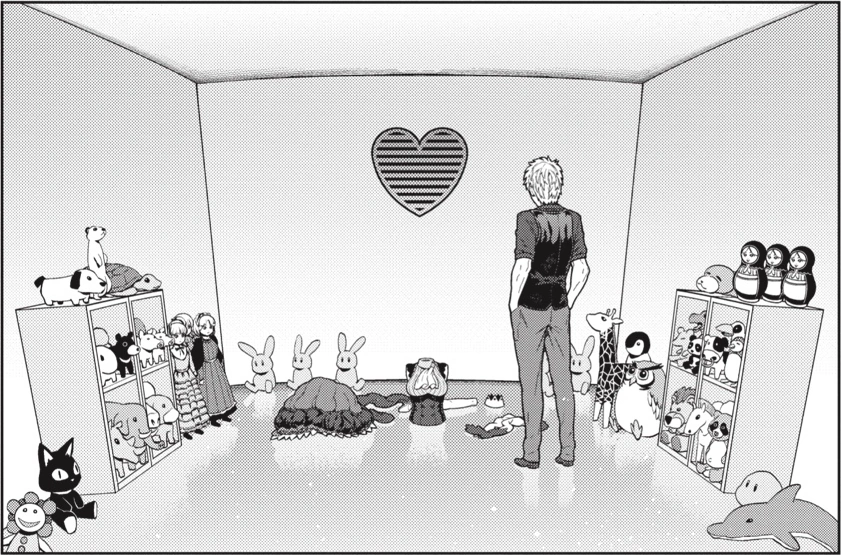

The Pink Room in the manga.
Dummy bullets are found when checking the plush bunnies.
In the official manga, the Pink Room is more visibly shown to be a toy room, with the shelves lined with dolls. Making the room very apt for the construction of the Laughing "Doll," Sue Miley.
Miley's Room[]

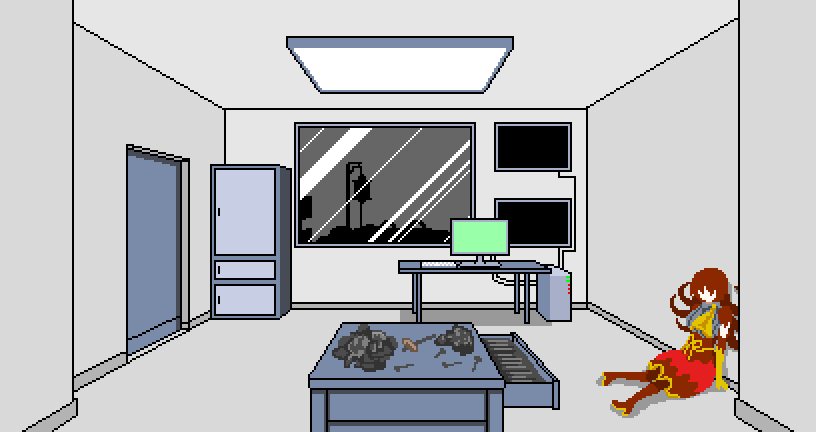
Miley's Room is a plain grey room with various kinds of technology, including a computer, multiple monitors, a refrigerator, and some sort of test lab with someone inside laying on a hospital bed that can be seen through a large window. A Victim Video, Victim Disk E, Victim Disk F, and the 1F Security Footage can be watched on the monitor. Many mechanical parts are scattered on the desk in the middle, and the Sue Miley doll is slumped against the wall.
[]
| v • e World of Your Turn to Die | ||
|---|---|---|
| Terminology | Artificial intelligence • Doll • Obstructor | |
| Death Game | Attractions • Main Game • Murderer Game • The Hades Incident • Trials | |
| Groups | ASU-NARO • Dummies • Samurai Yaiba | |
| Items | List of inventory items • Four Papers • Clear Chips and Me-Tokens • Collar • Kai's Laptop • Mew-chan • Ring-Up Box • Voting Tablet • Lantern | |
| Locations | Chidouin Residence • Isle of Memories (Beach hut) • Sonobeno High School | |
| Facility | Floor 1 • Floor 2 • Floor 3 (Prize Exchange) • Floor 4 • Floor 5 • Floor ? | |