| I'll warn you. SPOILERS. This article contains spoilers for Chapter 3, Part One, Section B. |
| Overview |
|---|
| 1F |
| 2F |
| 3F |
| 4F |
| 5F |
| ?F |

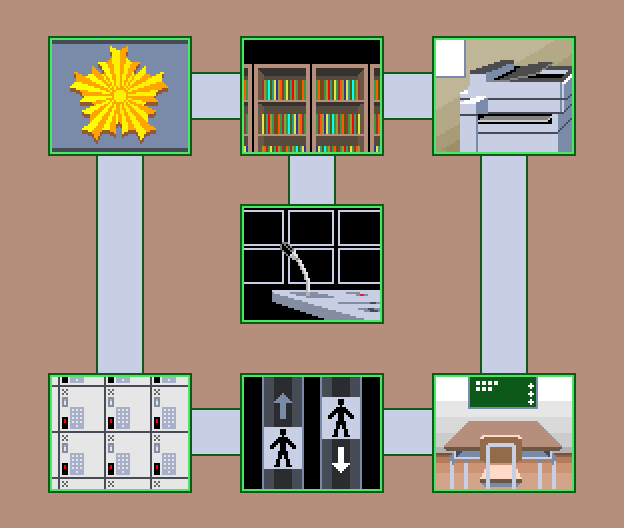
Floor 5 layout.
Elevators[]
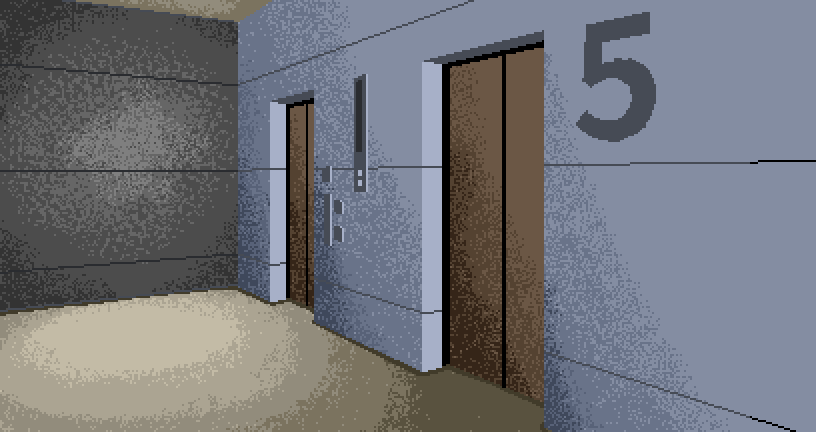
The fifth floor elevators are identical to those on the fourth floor, except the large printed "4" is changed to a "5". They only go down to the fourth floor. The map of the fifth floor is found on the ground, placed by Midori, the first time the elevators are used. They are located in the bottom center of the map and connect to the Locker room and Classroom.
Locker Room[]

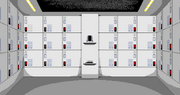
The fifth-floor locker room is similar to the fourth floor's, however, there are no stains on the floor or ceiling, all lockers are closed, and there is a voice recorder and transceiver on the shelf. The Locker room is located in the bottom right corner of the map and connects to the Elevators and the Police station. Alice Yabusame’s First Trial took place in this room.
Charging Room[]


A secret room located behind the back of fifth-floor locker room. It is unlocked after clearing the puzzle in the locker room. It contains a large machine which serves as a charger for the Dummies with a fixed-in drink machine. There is a small safe underneath the table that contains a picture of Reko, as well as a set of metal drawers on top of the desk that contain the instruction manual for the charger and a note that reads "Game Start: Blue 1, Red 6, Yellow 0." The door on the very right is a shortcut leading to the classroom.
Conduit Room[]


A secret room behind the Charging Room. Opened up by Hinako after Ranmaru is tagged by Midori. It contains a device that can reset the tag mode on the Dummies' collars. Ranmaru has to stand in the center while the other participants try to send electricity to him in order to reset his collar. If one of them receives too much electricity and passes out as a result, Ranmaru will die later on in the chapter by having Midori detonate his collar.
Police Box[]


A replica of the police station at which Keiji once worked, where he met and bonded with an old officer from his neighborhood. The station is just a facade, with nothing actually inside the building besides a poster. The Police Station is located in the top left corner of the map and connects to the Locker Room and the Library.
Library[]
A maze-like library that houses many bookshelves and a secret passageway. An army of red fanged book Obstructors is fought here after discovering the Security Office. Initially, there are slots for a red book, green book, yellow book, and blue book to go on the shelves, which are found in various places on the fourth and fifth floors. The books open up the secret passageway which leads to a stadium-like area with Midori. The Library is located in the top center of the map and connects to the Police Station, Office, and Security office.
- There are 5 red books.
- There are 7 green books. The green book Sara finds has a message from Midori that says the weakness of the strongest Obstructor doll, Maple; it's the crevice in her back.
- There are 4 yellow books. The yellow book Sara finds summarizes the physical exam information that was in the office computer.
- There are 5 blue books. The blue book Sara finds is Midori's experiment log, labeled "Shin Tsukimi AI Test Data."
")
")
Secret Arena[]


An area accessed by returning the four colored books back to the library. The floor is circular and multi-colored, going from green to yellow to red to blue. Midori is first confronted here before he retreats to the cemetery.
It resembles the Plaza where Anzu first met her master and started on her path to becoming a clown.
Security Office[]


Midori's room. The Shin AI resides within the monitor second from the left, and a Coffin Control System is located within the monitor second from the right. Midori's collar is also originally located here. The Security office is located in the center of the map and is accessed from the Library. The room is hidden until Sara points out a difference between the two maps she was given.
Office Space[]


A room resembling Shunsuke Hayasaka's office. A monitor displays Sara's information. Another monitor, unavailable unless Hayasaka finds a power cord, displays information on Emiri Harai and Michiru Namida. A yellow library book is propped up beside a computer. The Office is located in the top right corner of the map and connects to the Library and Classroom.
Classroom[]


A room that looks exactly like Sara and Joe's school classroom from before the Death Game. A satchel sits on a desk, containing a replica of Joe's dog charm. There is a green library book on the far shelf, and a consent form hung on the blackboard. After the Charging room is discovered, an opening appears on the left wall where the right-most "window" is and allows the Charging room to be accessed from the Classroom. The Classroom is located in the bottom right corner of the map and connects to the Office and Elevators.
[]
| v • e World of Your Turn to Die | ||
|---|---|---|
| Terminology | Artificial intelligence • Doll • Obstructor | |
| Death Game | Attractions • Main Game • Murderer Game • The Hades Incident • Trials | |
| Groups | ASU-NARO • Dummies • Samurai Yaiba | |
| Items | List of inventory items • Four Papers • Clear Chips and Me-Tokens • Collar • Kai's Laptop • Mew-chan • Ring-Up Box • Voting Tablet • Lantern | |
| Locations | Chidouin Residence • Isle of Memories (Beach hut) • Sonobeno High School | |
| Facility | Floor 1 • Floor 2 • Floor 3 (Prize Exchange) • Floor 4 • Floor 5 • Floor ? | |