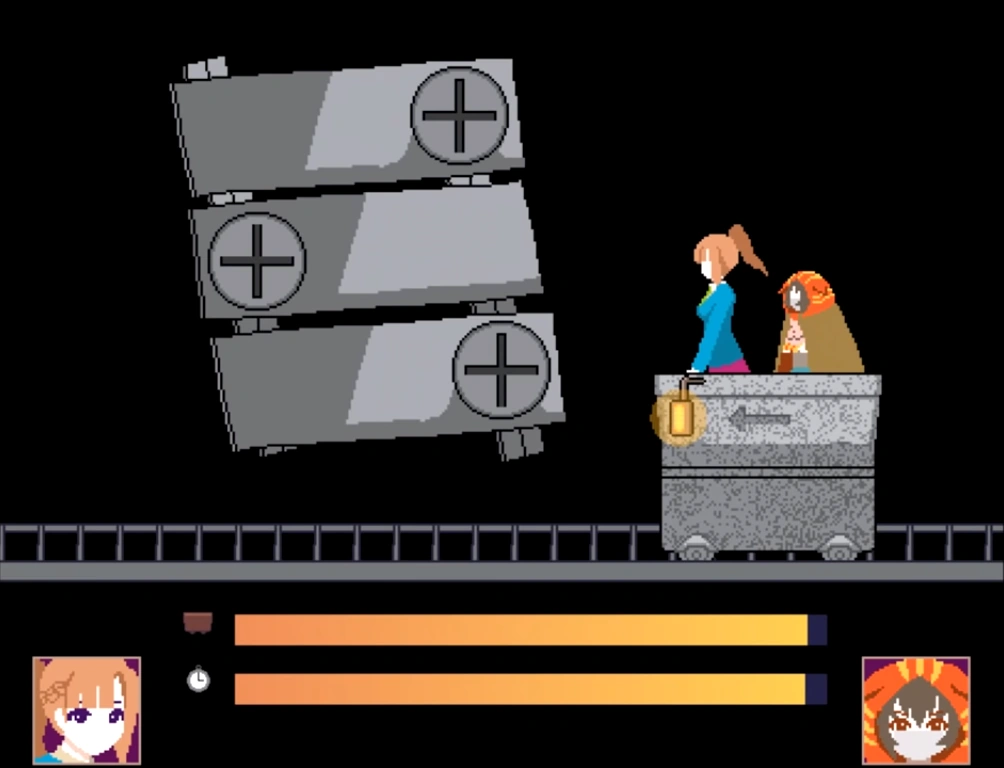
Attractions are found all around the third floor. There are a total of 11 attractions, with a total of 9 being playable. Most attractions are designed to be played by two participants, and failure will result in both of them being killed as a penalty. If the remaining participants do not earn 10 Clear Chips from the attractions, they will die. There is also one attraction that is not playable in which Sara Chidouin and Reko Yabusame retrieve 6 Clear Chips.
As Alice, your cage-like defenses reduce the number of times you need to mash when defending.
Difficulty: Normal
Charge Card Battle[]
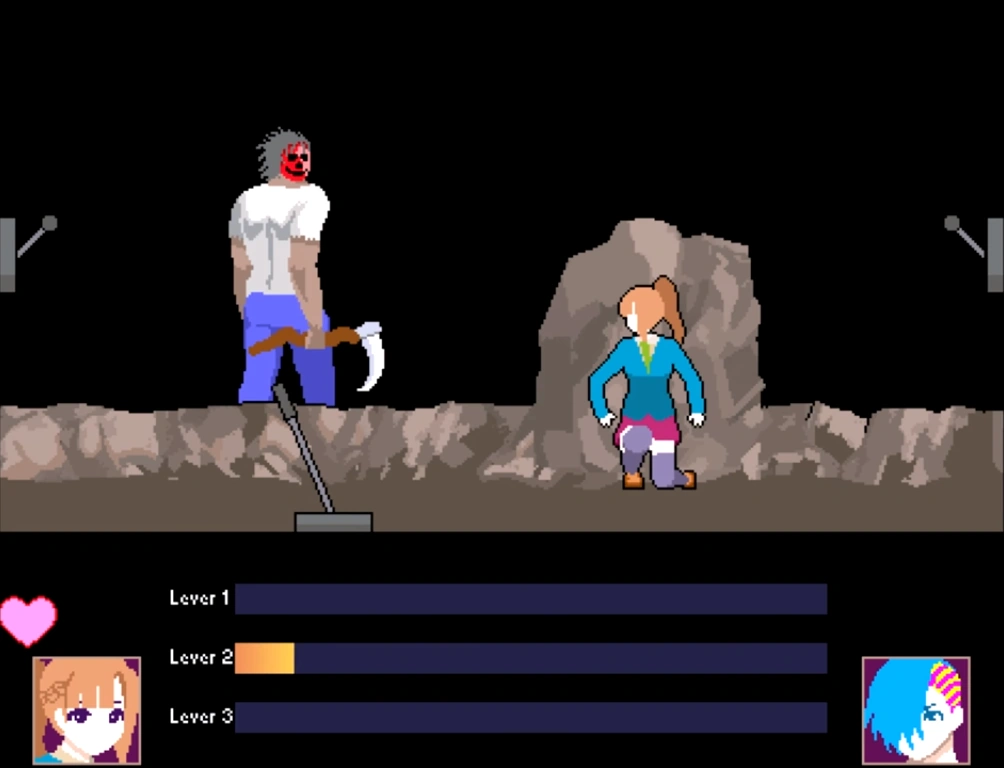
Location: Ruined Corridor
Clear Chip Reward: ★★
Difficulty: Normal
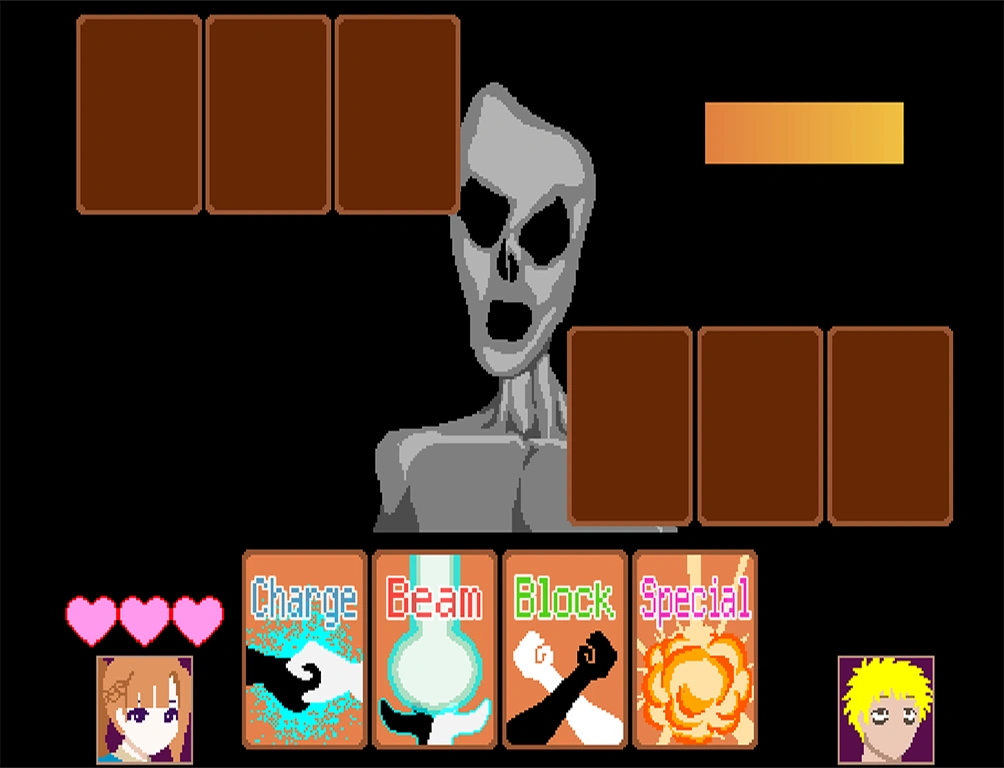
Charge Card Battle (タメウチカードバトル, Tameuchi kādo batoru?): A card game where you battle opponents by selecting three cards at a time. Defeat the three dolls to win.
You can see the type of weapon that will be displayed in advance.
Spirit Shutter[]
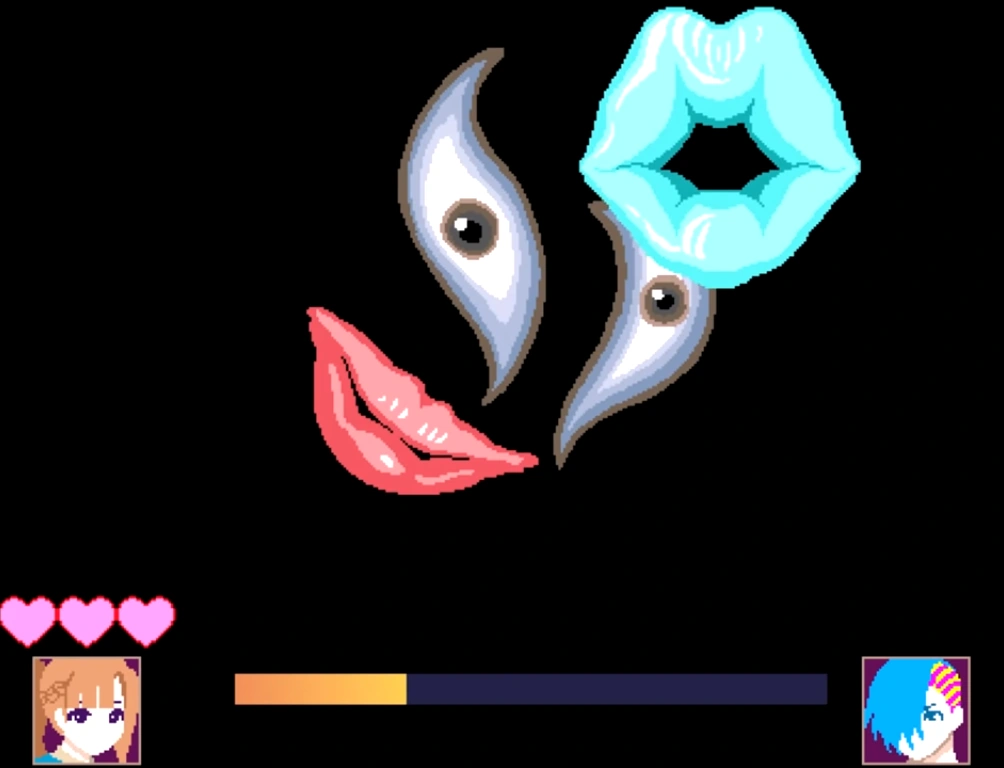
Location: Relaxation Room
Clear Chip Reward: ★★
Difficulty: Normal
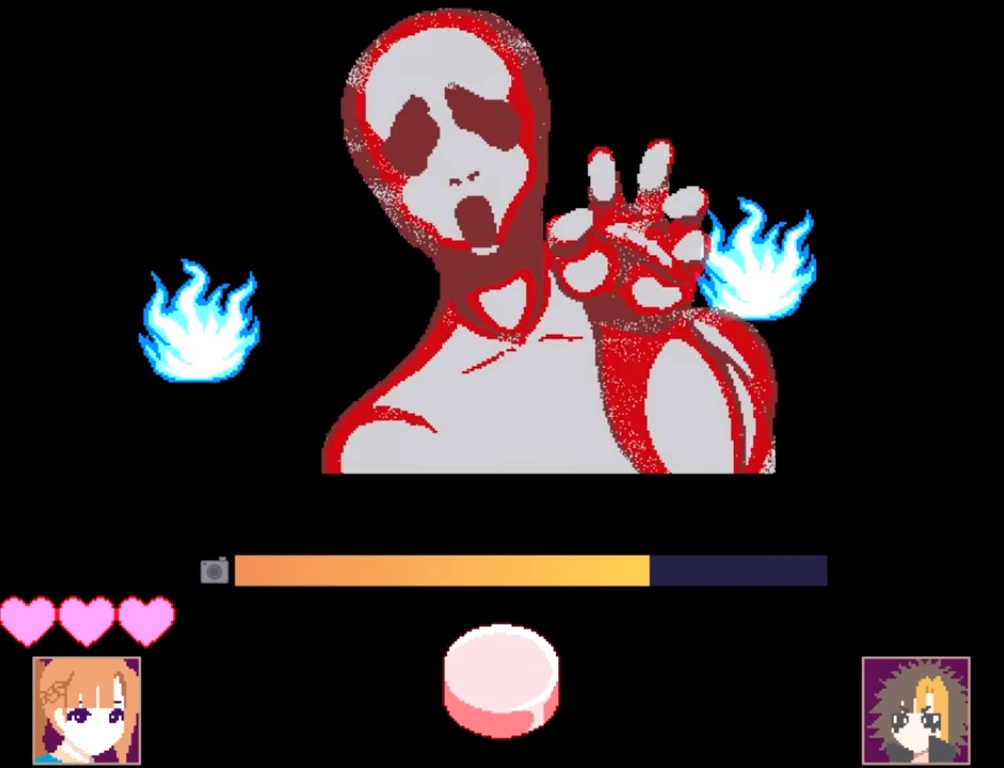
Spirit Shutter: (心霊シャッターゲーム, Shinrei shattā gēmu?): Get blue spirits, and when the ghosts appear, click the camera shutter to repel them. Gather enough souls, and you win.
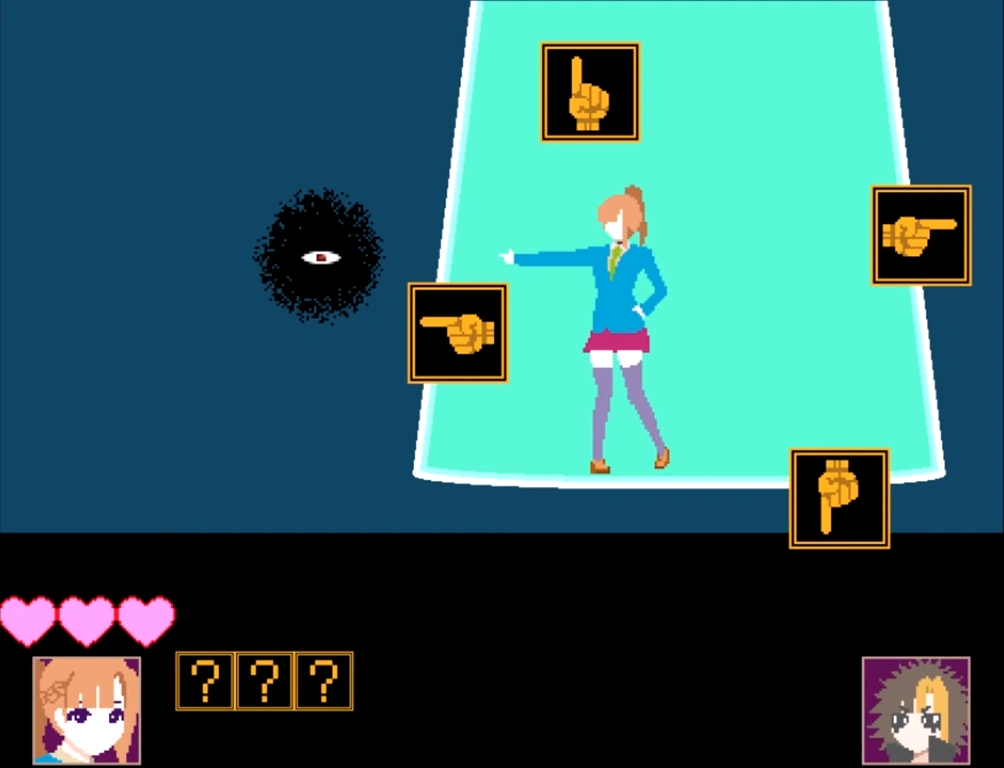
Stay On Target (滞留エリア限界線, Tairyū eria genkai-sen?, lit. "Retention area limit line"): Stay within the bounds of the areas produced by your opponents. Defeat the three dolls to win.
The patterns are easier and the charge speed increases.
Plot related attractions[]
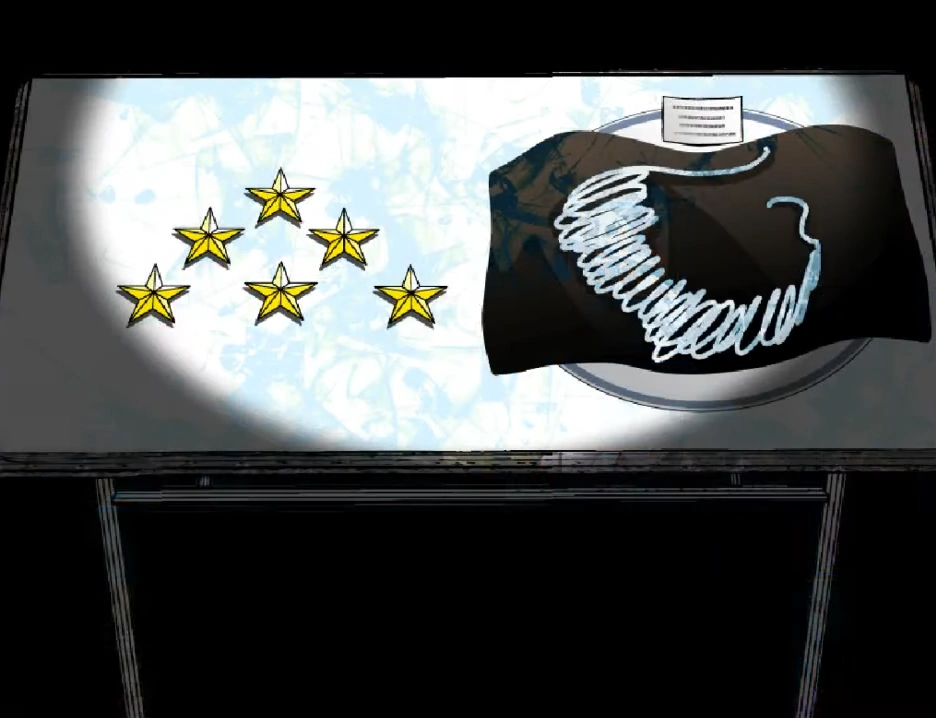
Bonus Attraction: Room of Lies[]
Location: Long Stairs
Clear Chip Reward: ★★★★★★
Difficulty: N/A
Room of Lies: Don't be fooled. If entangled by lies you'll die. Warning: The bonus will close once someone clears it.
Clear Chips and the Web of Happiness
The Room of Lies is first discovered by Reko Yabusame and Sara Chidouin, after the finding of a hidden button by Reko. They both enter the room and are met with a wooden table holding ten Clear Chips and a long piece of rope. As soon as Sara grabs the items a loud sound scares her out of the room, though attempting to bring Reko with her on the way out. When she escapes, however, it's quickly found out that Reko is missing (par from a single glove which Sara pulled off). It was only a moment later that a doll counterpart of 'Reko' left the room and met up with Sara, the latter noting that she had two gloves on, though dismissing her thoughts and giving the six Clear Chips to 'Reko' for her to hand out to the others.
The room is later used after Sara and Nao Egokoro either run out of time or refuse to push the clone 'Reko' into the pit, leading everyone to be freed (with the exception of Q-taro Burgerberg and Gin Ibushi, who are both poisoned). The clone version of Reko escapes back to the Room of Lies, where the real Reko is standing to the side. Nao is then given the option of choosing which one survives, though her decision wouldn't have mattered as the clone 'Reko' stabs the real Reko, thus killing her. The Room of Lies is also used in an alternative ending where Nao and Sara push the clone 'Reko' into the pit, leading for a distressed Alice Yabusame to run to the Room of Lies. Tia Safalin holds the head of the fake Reko and hands it to Rio Ranger who throws it to Alice. Unbeknown to him, however, the clone's collar activates and leaves a gaping hole through Alice's torso, leading for him to bleed to death. The real Reko is then set free to find Alice's corpse on the ground.
Later on, after the second card trade, a distressed Sara returns to the Room of Lies with the hope of stealing Alice's/Reko's Clear Chips so she can trade her 'Sacrifice' away. Much to her dismay, however, Safalin reveals that the deceased Yabusame didn't have any Clear Chips on their corpse, which were likely stolen by someone else earlier on (who was revealed to be Nao in the route where Alice lives).
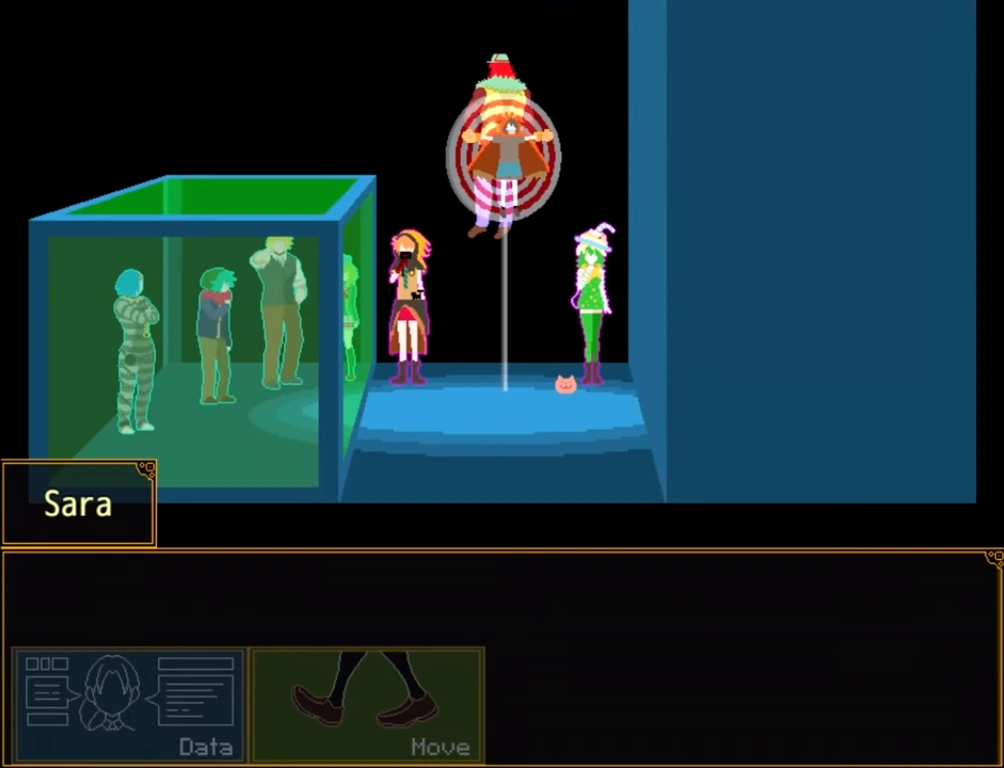
The Arbitration Room[]
The Arbitration Room is the 11th and Final Attraction of the Sub-Game. This Attraction punishes the participant who collected the least Me-Tokens, in which they get poisoned with 5 different venomous stingers. The participant who got the most Me-Tokens has the privilege of sacrificing themselves for them. All of the other participants are sealed in a large green box, where they are kept safe. It's up to thethreeparticipants up high in the "Impression Room" on who to decide should fall into the spikes, be impaled, and free the two vulnerable participants. However, there is a fake Reko present for this process, so therefore no human can die from this. The player's choice on what to do with the fake Reko chooses the route, and death in the aftermath of this attraction. Either Alice or Reko dies through the players choice.
Trivia[]
There are work in progress unused files of Kanna that implies she may have been available partner for Quick Draw and Runaway Minecart at some point in time.
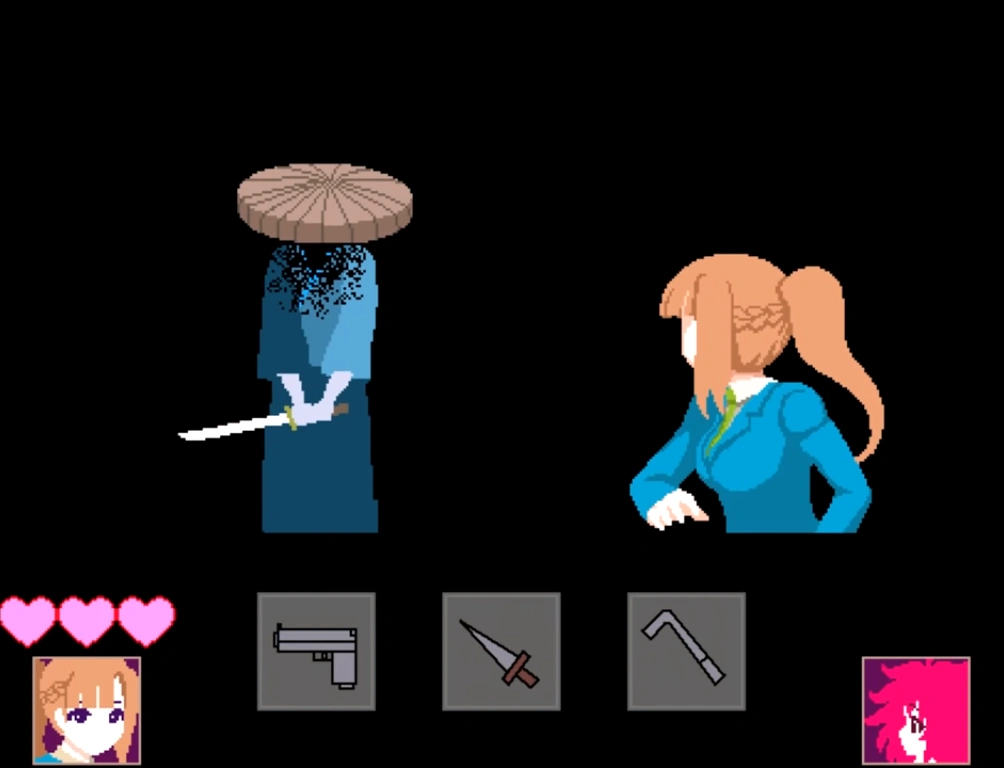
Neutral
Gun
Knife
Crowbar
Hurt
Neutral
Ducking
Interestingly, in Quick Draw Kanna has a unique sprite from when she is hit, unlike the final sprites used in game.


")
")
")
")
")
")
")